
How To Configure Web...
How To Configure Webzmail In Mac Mail ?

How To Configure Webzmail In Mac Mail ?
How to configure Webzmail in Mac Mail with this simple step-by-step guide. Effortlessly access and manage your Webzmail email account on your Mac for efficient communication.
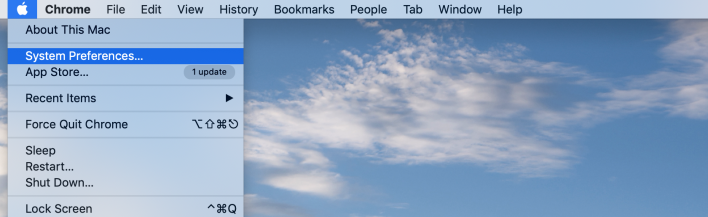
1.Open Mac Mail:
Click on the Apple Icon Menu on the top left of your screen and select the System Preferences sub menu.
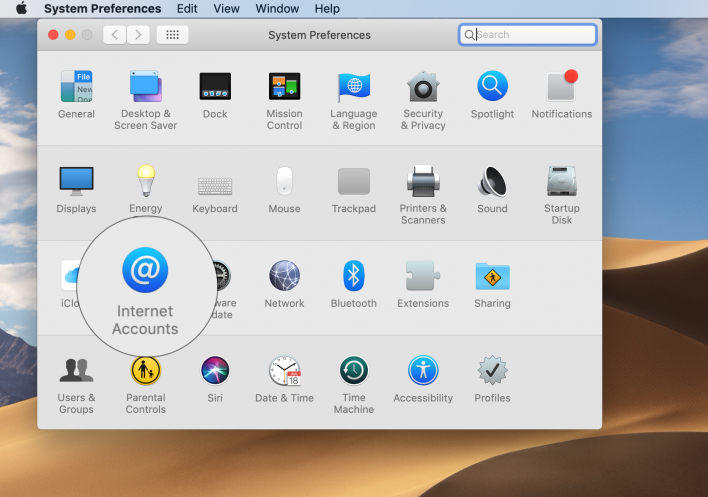
2. Add a New Account:
You will be taken to your System Preferences screen where you can adjust various options of your Mac OS. Select the Internet Accounts link to proceed.
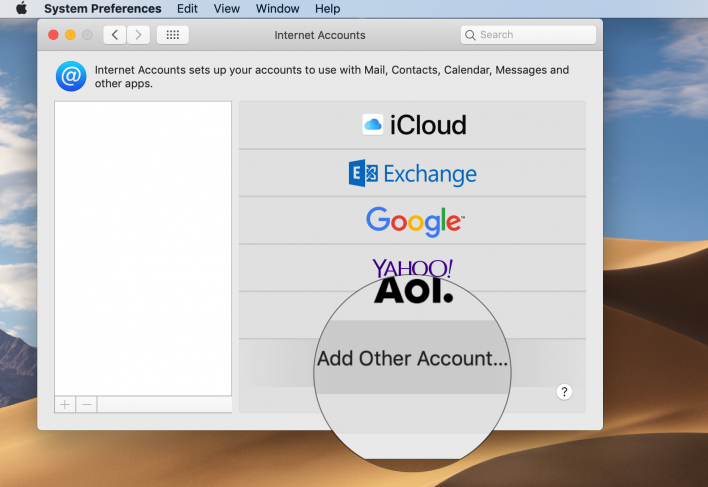
3. Add Other Account:
Here, you will see a list of all the different accounts you have registered including iCloud, Facebook, Vimeo, etc. Scroll down and select the Add Other Account option.
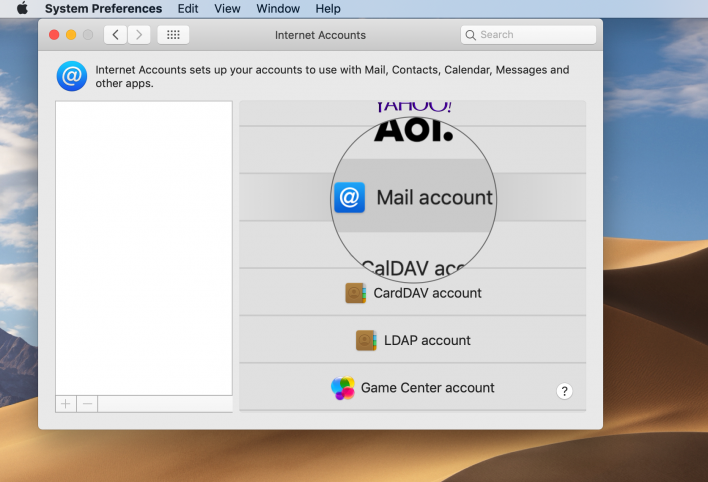
4. Mail account:
Next, select to add a Mail account on the next screen.
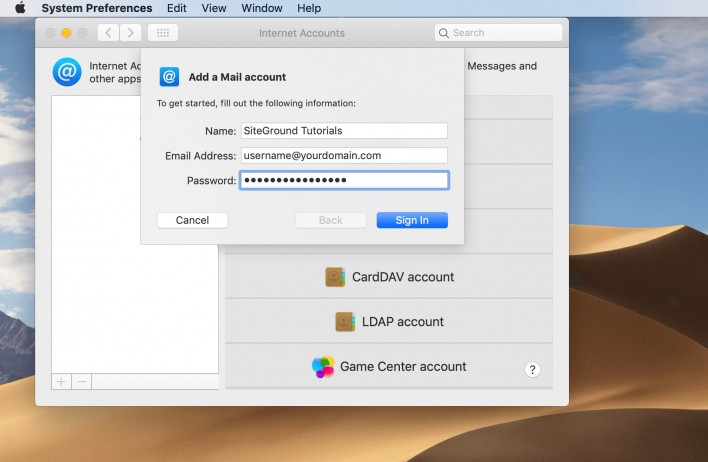
A pop-up will appear asking you to fill in your name and the Email address that you want to register with Mac Mail. Note, that people you send emails to will receive them from the name you enter here. This option, however, can be changed later on. Finally, click Sign in to proceed.
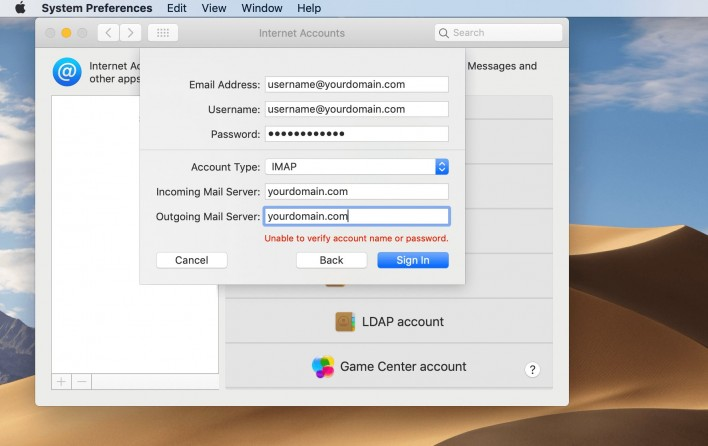
5. Fill in Account Information:
Now, you have to fill in the server settings for your Email account:
a. Email Address: – Enter your full email address
b. Username: – Enter your full email address as a username, i.e username@yourdomain.com. It will be used both for the incoming and outgoing connection.
c. Password: – Enter the password for your email account
d. Account Type: – It’s set to IMAP by default. Unless you specifically want to use POP3 you should leave it that way.
e. Incoming Mail Server: – mail.webzmail.in
f. Outgoing Mail Server: – mail.webzmail.in
g. Once you fill in all the details, press Sign In to proceed.
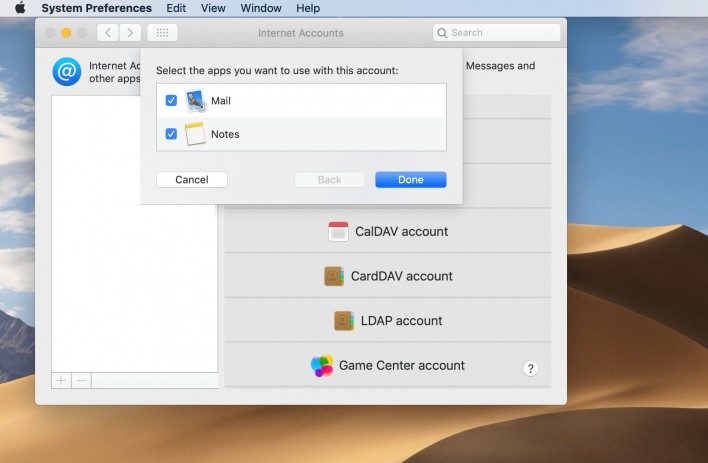
Finally, you will be asked which programs you want to use this account with. The available options depend on the applications you have installed on your account.
6.Configure Mail Server Setting:
Edit existing email account settings in Mac Mail.
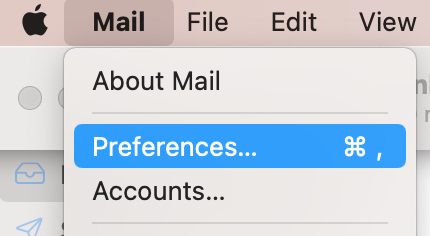
Click the Mail tab, select your email from the accounts list and click the Server Settings tab.
7. Below are the settings:
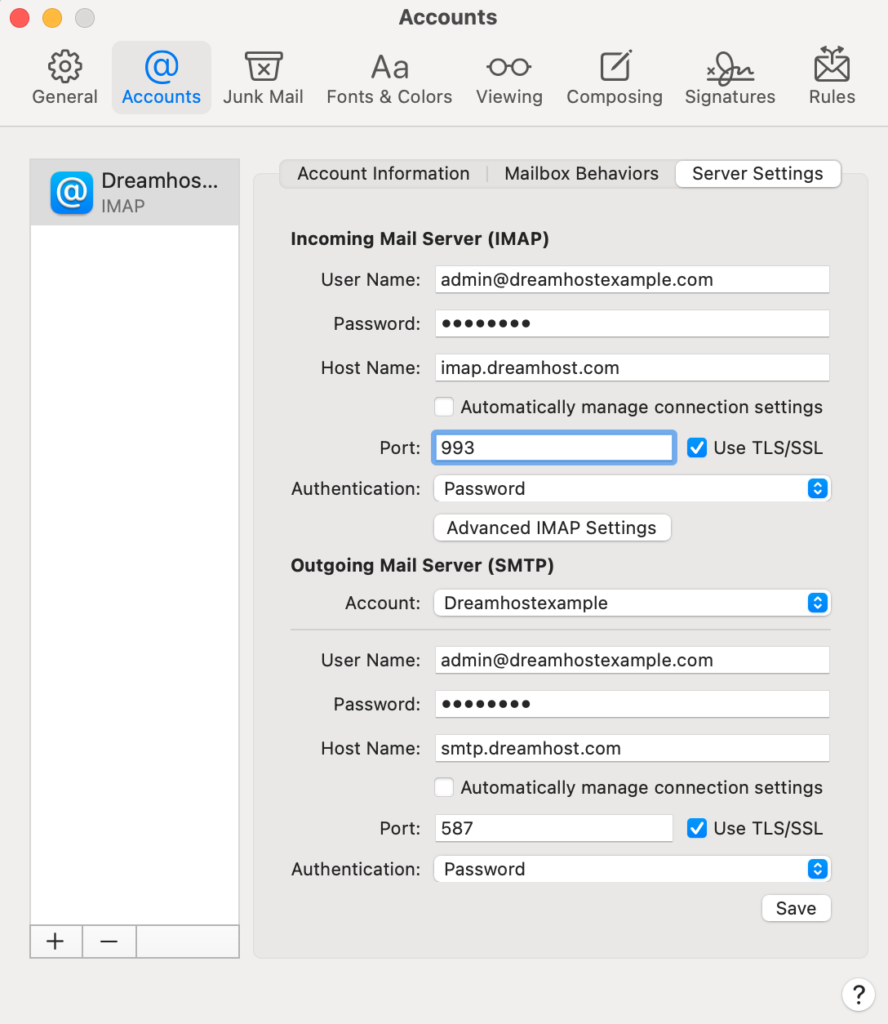
Incoming Mail Server ( IMAP )
a. Username : Enter your full email address
b. Password: Enter your full password
c. Host Name: mail.webzmail.in
Untick to Automatically manage connection setting
a. PORT: 993
b. Tick to use SSL
c. Authentication: Add our password
Outgoing Mail Server ( SMTP )
a. Username : Enter your full email address
b. Password: Enter your full password
c. Host Name: mail.webzmail.in
Untick to Automatically manage connection setting
a. PORT: 993
b. Tick to use SSL
c. Authentication: Add our password
8. Finalize Setup:
Once your Webzmail account is successfully added, consider customizing additional settings such as mailbox behaviors, notifications, and more to suit your preferences.