Outlook Send/receive...
Outlook Send/receive Error? Setting For Outlook 2016 / 2019

Outlook Send/receive Error? Setting For Outlook 2016 / 2019
Discover how to troubleshoot Microsoft Outlook 2016/2019 send/receive error efficiently with our step-by-step guide. Learn to validate essential account settings, including the incoming and outgoing mail servers, ensuring seamless email communication. Resolve Microsoft Outlook 2016/2019 send/receive error with ease using our comprehensive guide. Verify account settings, secure servers, and enjoy uninterrupted email communication.
1. Start Outlook 2016 or 2019.
2. Select the account.
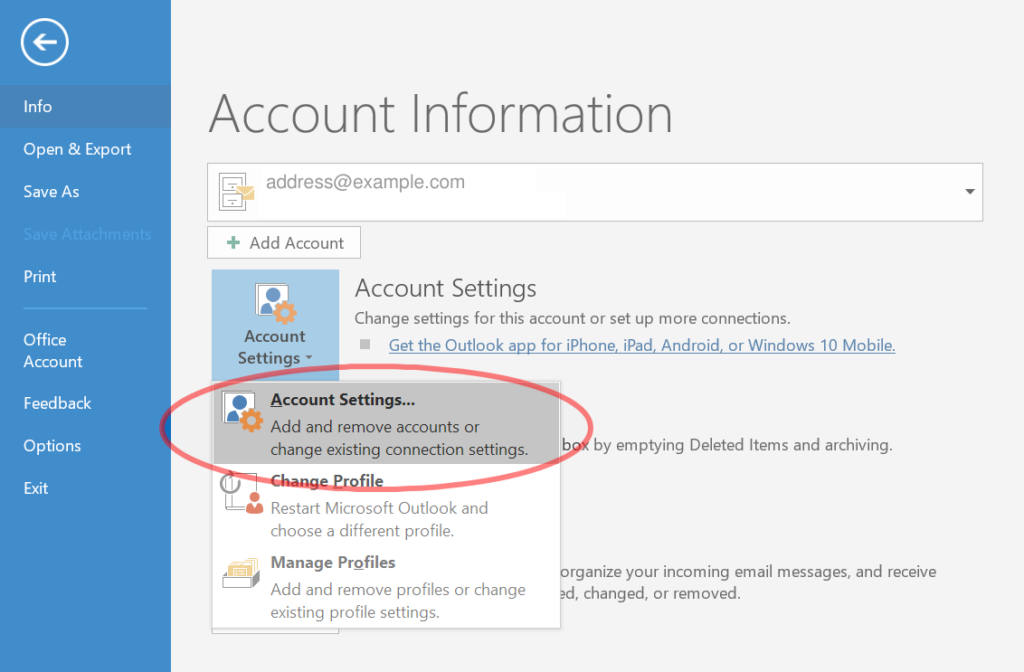
3. Click the File tab on the ribbon

4. Then click Account Settings. A drop-down menu will appear to choose the Account Settings option:

6. Click on the Email ID

7. Verify the basic account settings.
8. Once you click on the email ID, the window should look like this:

9. Incoming mail server: mail.webzmail.in
10. Outgoing mail server: mail.webzmail.in
11. User Name: your email address (all lowercase)
12. Remember password should be checked
13. “Require login using Secure Password Authentication (SPA)” should not be checked.
14. After verifying these settings, click the More Settings button. The “Internet E-mail Settings” window appears.
15. Verify the “Outgoing Server” settings.
16. The outgoing server settings should look like this:

17. Verify these settings:
18. My outgoing server (SMTP) requires authentication should be checked
19. Use the same settings as my incoming server should be selected
20. Verify the “Advanced” settings.
21. Click the Advanced tab. The window should usually look like this:

22. With the following values:
Incoming Server (IMAP): 993
Use the following type of encrypted connection: SSL
Outgoing Server (SMTP): 587
Use the following type of encrypted connection: SSL
23. If everything looks okay, click OK to close the “Internet E-mail Settings” window.
24. Test the settings.
25.Click Next. Outlook should tell you that “all tests completed successfully”:

26. If Outlook tells you a test failed, double-check to be sure you’ve entered the settings correctly.
