
How To Configure Clo...
How To Configure Cloud Email To Mail – Apple Device

How To Configure Cloud Email To Mail – Apple Device
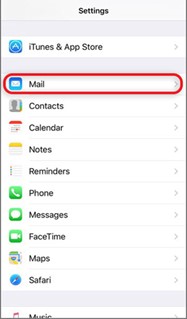
Step 1: Select the Settings icon on your home screen.
Step 2: Select Mail
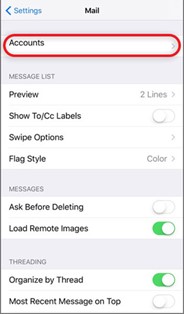
Step 3: Select Accounts
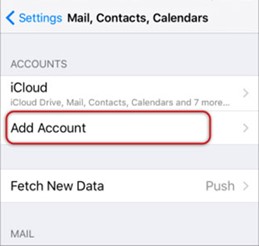
Step 4: Select Add Account
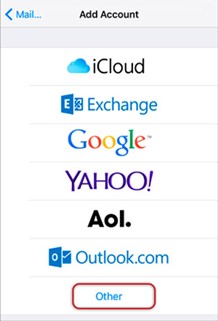
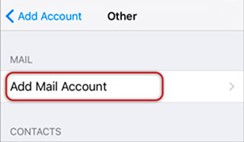
Step 5: Select Other from the menu.
Step 6: Select Add Mail Account
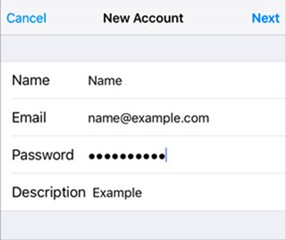
Step 7: Enter your Name, Email & Password and then click Next.
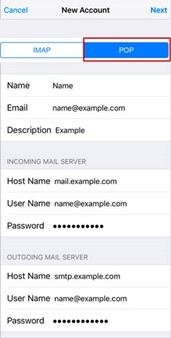
Step 8: Select POP. Scroll down to Incoming Mail Server and enter all the relevant details, then do the same for Outgoing Mail Server, as in the screen below and then select Next.
- Ensure that Username is the full email address. Username & Password are the same for both Incoming & Outgoing servers.
- Incoming Mail Server Host Name is pop.rediffmail.com
- Outgoing Mail Server Host Name is smtp.rediffmail.com
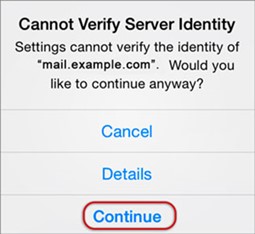
Step 9: You may receive a prompt asking you to verify the incoming and outgoing servers – you can click continue for each or tap “Details” and then tap “Trust”
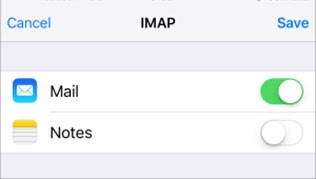
Step 10: Save
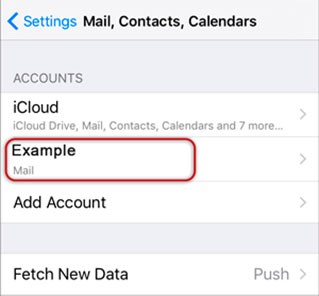
Step 11: Choose the new account that you’ve just created
Step 12: Choose the SMTP server
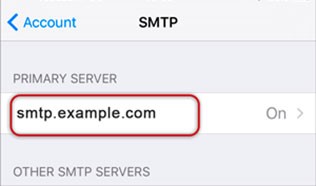
Step 13: Check the SMTP settings and click Done
- Outgoing Mail Server Host Name for REDIFFMAIL.COM is smtp.rediffmail.com
- User Name: Full REDIFFMAIL.COM email address
- Password: Your email password
- Use SSL is On. You can also turn it off and use the correct Port number as below
- Outgoing (SMTP) Secure – Port: 465 and Security Type: SSL/TLS OR
- Outgoing (SMTP) – Port: 25 and Security Type: None
- Authentication is Password

Congratulations! You are all done here and ready to use your email account on your iPhone.